DIY Framed Wall Art Calender

DIY Framed Wall Art Calender - All you need to turn old outdated thrift store paintings into beautiful dry-erase wall calenders!!

How to make a lovely framed calender that looks like a work of art from thrifted frames. 

I have had this huge old ugly framed floral print in my craft room for years. I never could throw it out because it seemed like such a waste of an awesome frame! In November I got married and moved into a new house. That means a new craft space. I wanted a huge dry erase calender for the wall to keep my projects right in front of me. 

DIY Framed Wall Art Calender - All you need to turn old outdated thrift store paintings into beautiful dry-erase wall calenders!!

I love how it turned out. Now here's how I did it.

This is what you'll need:

DIY Framed Wall Art Calender - All you need to turn old outdated thrift store paintings into beautiful dry-erase wall calenders!!

and of course the frame.

DIY Framed Wall Art Calender - All you need to turn old outdated thrift store paintings into beautiful dry-erase wall calenders!!

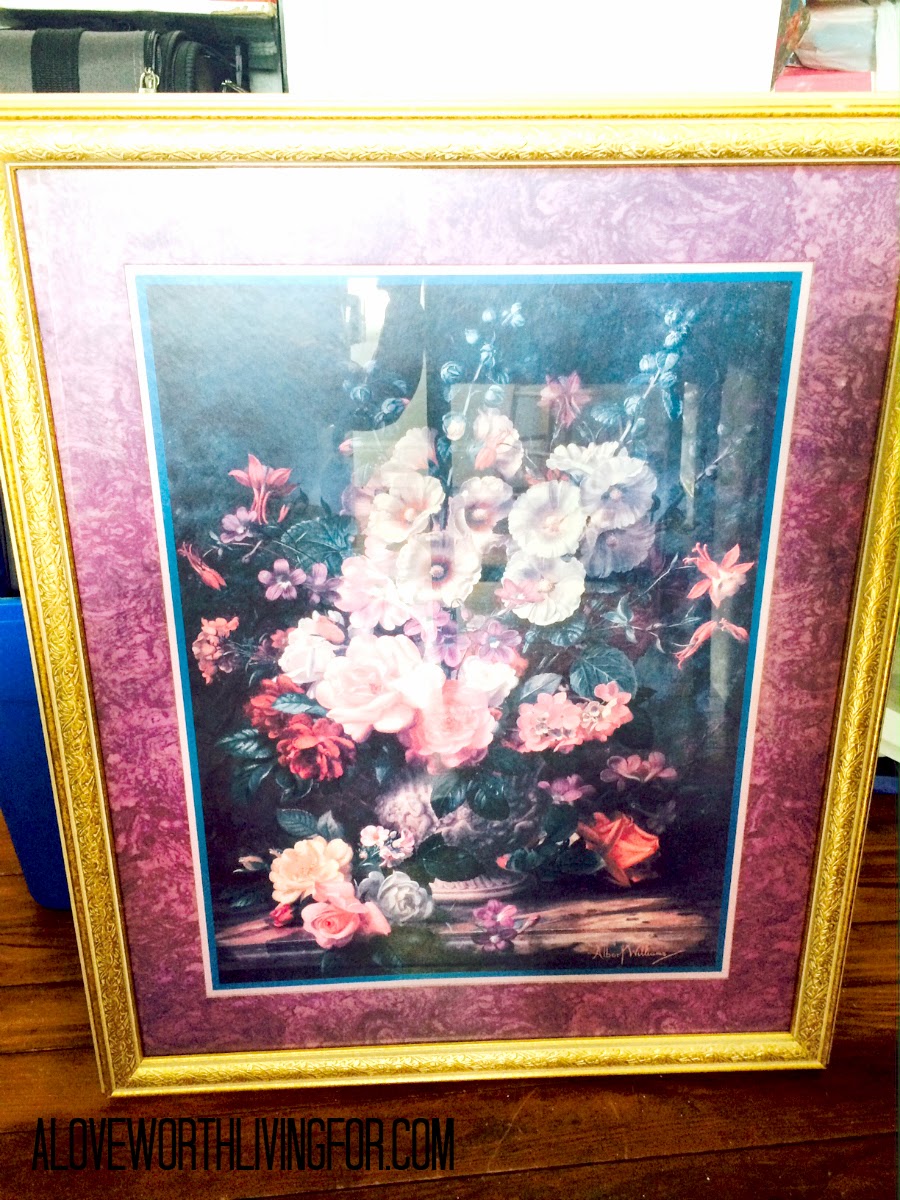
Frames are super expensive I have noticed. However the thrift stores are over flowing with people's old prints from the 90's. You could get huge frames for under 5 bucks usually. I got this one, which is 29 1/2 x 23 1/2, from the local homeless shelter by trading them one of my painted canvases and taking this one off their hands. 

I don't think it's the print that I hate but the mat. Just not my style. The frame, however, is gorgeous!

DIY Framed Wall Art Calender - All you need to turn old outdated thrift store paintings into beautiful dry-erase wall calenders!!

So first things first. We gotta take this thing apart. The back usually has some king of paper covering it. once you rip that up, the print is usually just cardboard. Gharrah came to investigate. (:

DIY Framed Wall Art Calender - All you need to turn old outdated thrift store paintings into beautiful dry-erase wall calenders!!

The print and the glass are generally held in by staples. I just bend those staples all up using a butter knife and see if the guts will come out that way. If you can get it out without removing the staples this will make reassembling it sooooo much easier. 

DIY Framed Wall Art Calender - All you need to turn old outdated thrift store paintings into beautiful dry-erase wall calenders!!

After I had the glass and card board print out of the frame I put the glass somewhere safe, grabbed the frame and headed outside to spray paint it. I love the frame but the yellow gold just wasn't my style. Insetad I toned it down with some champagne spray paint. I let that dry and then sealed it with a clear coat. 

DIY Framed Wall Art Calender - All you need to turn old outdated thrift store paintings into beautiful dry-erase wall calenders!!

I left that to dry and went back inside to start working on the guts of the calender. First I took the print and flipped it over on my desk and covered the back of it with double sided tape.

DIY Framed Wall Art Calender - All you need to turn old outdated thrift store paintings into beautiful dry-erase wall calenders!!

Then I tool my roll of paper and just rolled it across the taped back of the print. I used a craft colored paper used for mailing things. Depending on the look you are going for, you could use any wrapping paper or bulletin board paper for a background.

DIY Framed Wall Art Calender - All you need to turn old outdated thrift store paintings into beautiful dry-erase wall calenders!!

Now just flip it over and trim around the edges and you have your foundation.!

DIY Framed Wall Art Calender - All you need to turn old outdated thrift store paintings into beautiful dry-erase wall calenders!!

Next comes the slightly more difficult part. Math. 

You are going to want to measure your frame and then figure out how big you want your calender day squares. I wanted an inch and a half margin around so I subtracted 3 inched from the height and width. Then I wanted to have margins that were a fourth of an inch in between the days so I subtracted another 3 inches from the both the height and the width. I took the width and divided that by 7 (days of the week) and that's how wide my squares are. Height wasn't such a big deal because I wanted space left.

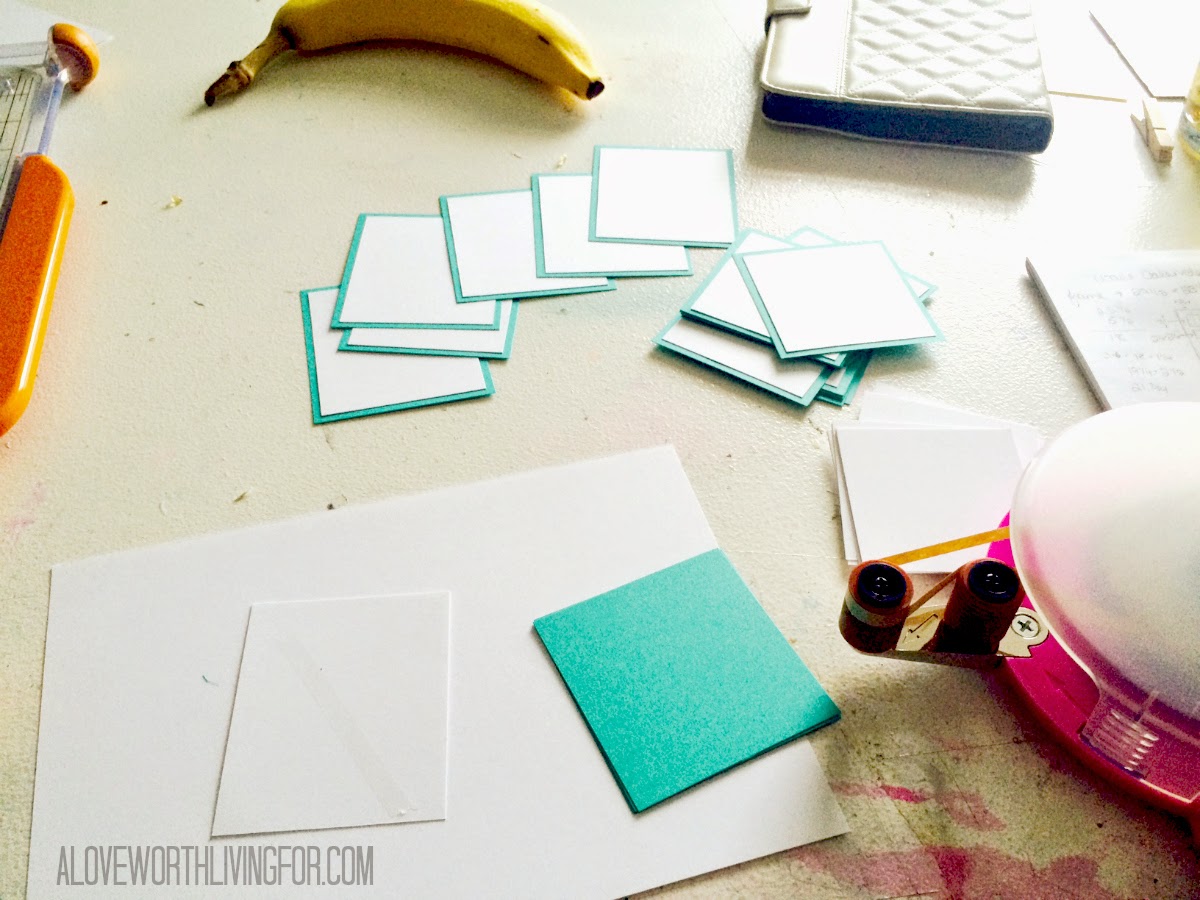
I decided I wanted a colored border around mine so my blue squares are 2 3/4 inches and my white squares are 2 1/2 inches. I also made my day squares a half of an inch longer just because I liked the look of it. 

So once you have decided what size to make your squares you will need to cut seven for the days of the week and then 35 for five weeks worth of calender days. 

DIY Framed Wall Art Calender - All you need to turn old outdated thrift store paintings into beautiful dry-erase wall calenders!!

Once I had those cut I used more double sided tape to tape the white squares to the blue.

DIY Framed Wall Art Calender - All you need to turn old outdated thrift store paintings into beautiful dry-erase wall calenders!!

Then I layed out the days the way I wanted them and began to tape them down. It was around here that I realized I wanted a space or the month. I cut that out and spaced everything accordingly. 

DIY Framed Wall Art Calender - All you need to turn old outdated thrift store paintings into beautiful dry-erase wall calenders!!

Once I had all the days down, I wrote out the days of the week on the top row before I taped them down. I decided to hand write mine but you could use a cricut or sticker letters or even just print them out.

DIY Framed Wall Art Calender - All you need to turn old outdated thrift store paintings into beautiful dry-erase wall calenders!!

After I taped those down. I just measured what space was left at the bottom and cut out some large solid pieces of card stock that would fit perfect and taped them down as well.

DIY Framed Wall Art Calender - All you need to turn old outdated thrift store paintings into beautiful dry-erase wall calenders!!

After that you can decide if you want to add decorations or washi tape to it. I wanted mine clean and simple so I left mine minimal and slid the glass and then the calender back into place.

DIY Framed Wall Art Calender - All you need to turn old outdated thrift store paintings into beautiful dry-erase wall calenders!!

I just folded the staples back down to hold it all in and then mounted it on the wall.

DIY Framed Wall Art Calender - All you need to turn old outdated thrift store paintings into beautiful dry-erase wall calenders!!

I love how it turned out! If you DIY this then leave me pictures on instagram using the tag #WorthLivingFor!!

DIY Framed Wall Art Calender - All you need to turn old outdated thrift store paintings into beautiful dry-erase wall calenders!!

DIY Birchbox Box Storage

I am a huge subscription box fan. I love getting a wonderful box or bag full of goodies on my door step each month. Birchbox is one of my favorite subscription services. Once I have sorted through the goodies, I am always inspired by the left over box. Over the past several months I have had the  boxes just piling up because I cannot for the life of me just throw away a perfectly good box.

So I have decorated them and glammed them up to us in my craft room. Here is how!:

What I used: White Gesso (you could also just use a white paint.); Lace Ribbon; Glitter, Glitter & More Glitter!; Mod Podge (or your favorite glue.); Paint!; Scissors; Paint Brush & Double Sided Tape (pictured but not labelled.

So first, it makes things look nicer if you coat each box with a coat of gesso or white paint. I used gesso.

Next I gave each box a coat of paint. I let this dry completely & then painted in a second coat. If you are going to cover the box in glitter or the lace one coat would probably be enough.

For this box I wanted to cover the lid with the lace ribbon. I used the double stick tape to stick the lace down & then I brushed on some Mod Podge & let that dry.

I wanted one of the boxes to have just a stripe of lace. I used a strip of the double sided tape & then Mod Podged over the whole lid to give it a finished look.

This one is my FAVORITE!!! I painted the box & lid a pale pink. Then I brushed on a layer of Mod Podge and sprinkled on some cheap glitter (1) that I had laying around that I wasn't even really crazy about. After shaking off the extras (2) I immediately sponged on some more Mod Podge (3). I did this is dabbing motions so that I didn't move around any of the first layer of glitter. Then I sprinkled more glitter on top (4) and I let those two coats dry.

I repeated that process on the sides & then I gave the whole thing one more protective coat of Mod Podge. At first I was super unimpressed but once the glue dried it looked sooooooo good! 

I let boxes dry completely, attached some labels & filled them up with things!

They turned out so pretty. I love them! 

If you do this project on your own send me a picture! 

If you don't have a Birchbox subscription & want one feel free to use my referral link! ---> 

Subscribe to Birchbox!

(This post is not sponsored.)